In the early years of film making, in the 1900's. There wasn't a specific way of editing for meaning. So in the 1900's the footage was shot on a rail of film which was wound up together, once the footage was all made they physically cut the film and stuck it back together in the places they wanted or needed the shot, this is known as splicing.Up un till the 1990's linear editing was the only method of editing, this was called video editing. Once this is finished, the final video tape is called the master. Now the art of film making has developed so we use non-linear editing, we have footage on a camera which is uploaded onto a piece of soft ware used to edit footage on post production from a DV tape or an SD card.
Transitions- Transitions are a form of editing for how a shot either begins or how the shot ends. transitions can be used to make the sequence flow easier. They can also be used to change the pace of the sequence to make it faster or slower. Some transitions may include a cut which is cutting the footage form where one image ends and anther begins immediately after. Another transition may be a dissolve which is typically used to show a characters thoughts or dreams. A fade may be used to fade in or out of shots to create a gentle transition of time or a location. Wipes are used to push the previous shot out of screen by the following shot.
Visual analysis
In this clip at 0:50 there is a eye line match. This is a technique where there is a shot of the actor looking out of frame then the shot cuts to what the actor is looking at before the action starts. An eye line match is used because it gives the audience a sense of being there in the frame. An eye line match is used to allow the audience to gain a physical idea of being in the situation.


Shot one - Protagonist looking out of shot. Shot two - Cut to what protagonist is looking at up to action.
The continuity system
Shot reverse shot and the 180 degree rule.


At 1:21 there is a shot reverse shot and a 180 degree rule shot. A shot reverse shot is filming one character talking in one direction then the next shot is the other person talking in the opposing direction.The 180 degree rule is an imaginary line where the cameras can be places to maintain continuity, crossing this line will result in continuity errors. These are often used to show two characters talking and interacting with each other however in this example the protagonist is leaving.
Establishing shots


Here there are two establishing shots. Establishing shots is where there is shot of a place or area before the actors walk into the frame. At 3:01 there is a shot of the gate before he actors walk in front of the frame towards the gate. The seconds establishing shot is the characters walking out of the gate an out of frame, after this the camera then pans upwards.
Match cuts on action


A match cut on action is where there is action happening in one shot, then it cuts to another shot of the same action happening. In the first screen shot at 1:22 we see an over the shoulder shot of the protagonist leaving, where we can see the door beginning to open. In the second screen shot at 1:23 we have another over the shoulder shot, we can see the door closing in that shot.
Motivated editing


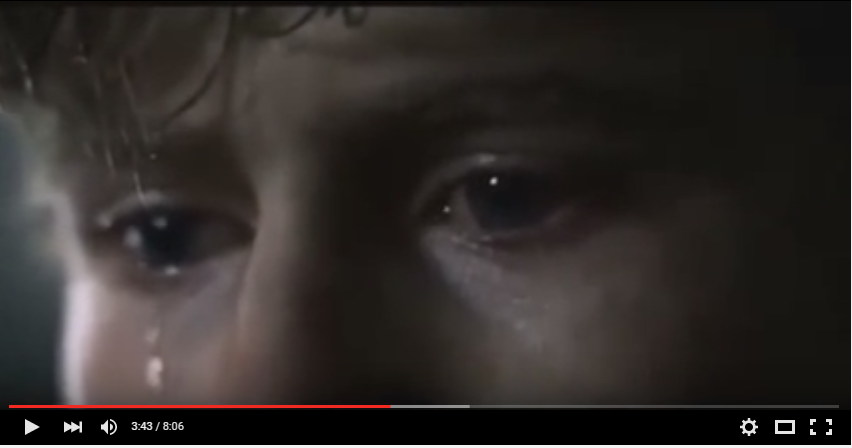
Motivated editing is when there is one shot of the protagonist looking out of shot then the cut exposes the reason for the reaction. At 2:20 in the first screen shot we see the protagonist looking out of shot, then at 2:22, we see the reason for the reaction. This is also known as an eyeline match-cut.
Identification with main protagonist
Screen time is how long and how often the main protagonist is on screen for. This helps the audience to understand who the main character is.
All of these shots are how often through out the clip the protagonist is shown in frame. All of these are also in chronological order.


Close-ups are zoomed in images of either characters or objects. This type of shot is used to show things in detail such as the characters emotion. This allows he audience to have an emotional and physical connection with the character. All of these are also in chronological order.

 The screenshot on the left is at
0:01. The one on the right is
0:11. This allows the audience to know what the protagonist is doing.

 The screenshot on the left is at the mark of 0:23. The one on the right is at 0:29. This then allows the audience to know the relationship between the two characters.
 On the left it is at 1:09. But on the right it is at 1:28. This shows the other character interacting with the main protagonist.
 The first screenshot is at 1:59 and the second is at 2:07. This is used to show what the protagonist is doing, he presses down the button to release all of the cans making noise to attract all of the zombies.
 The first one is at 2:21 and the second is at 2:34. The first is the protagonist walking around the corner. Then the second is the same character beginning to walk through the group of zombies.
 The first is at 2:44. the second screen shot is at 2:50. In the first, we see the protagonist walking through the group of zombies, it then cuts to a wide shot of the door then back to the protagonist walking towards the door.
 The first screenshot is at 2:52. The second is at 3:00. In the first we see the injection being put into the protagonists arm and the second is the protagonist interacting with the other character.
Point of view shots are shots in which the camera moves at the same pace as the character at the same angle. So the audience see's what the main protagonist see's.
 This first screenshot is at 2:25. Here we see the main protagonist walking forwards towards the group of zombies, this then cuts to the second screenshot which is at 2:28. The camera proceeds to move forwards towards the zombies as they run forward. This is also known as an eye line match.
Reaction shots are where something happens in one shot or a comment is made in one shot and then the following shot is the characters reaction to the previous shot.


Final section and conclusion
Shot variation- Having a shot variation in a film is useful because it can help to change the pace of the film. Having a variety of shots can help the audience to develop a emotional connection with the characters or it can help the audience to have a physical connection with the characters as well. If the film have a wide variety of shots can help to set the form of action which can show the genre of the film e.g action, drama etc. Below are some examples of different shot types:
Extreme long shot (ELS)- This is usually used to show an environment because the camera is so far away from a specific object that is difficult to see in detail. These can also be used for establishing shots.
I couldn't find an extreme long shot in my originally chosen clip so I found one in a different scene for the same film.

Long shot (LS)- This particular shot shows the character form head to toe so it shows the whole character in frame.

Medium shot (MS)- This shot is typically from the waist and upwards. this is used to show the characters body language, their costume and also their emotion.

Close up (CU)- This is a shot in which the subject is larger in the frame, this is usually from the top of the chest to the head. This is used to show the emotion of the character in more detail.

Extreme close up (ECU)- This shows extreme details in a lot of detail which focuses on one particular element of the shot. When a scene becomes more intense the shots will get smaller which creates more of an emotional response for the viewer.
Wide shot (WS)- This shot puts an object or a subject in their surroundings and shows the full body of a character whilst action is happening.

Point of view shot (POV)- This shot puts the viewers in the place of the protagonist. POV shots are shots of the view of the character. This is mostly used in horror fims to put the audience in the place of either the villain or possibly the victim.

This shot can be found at 2:22.
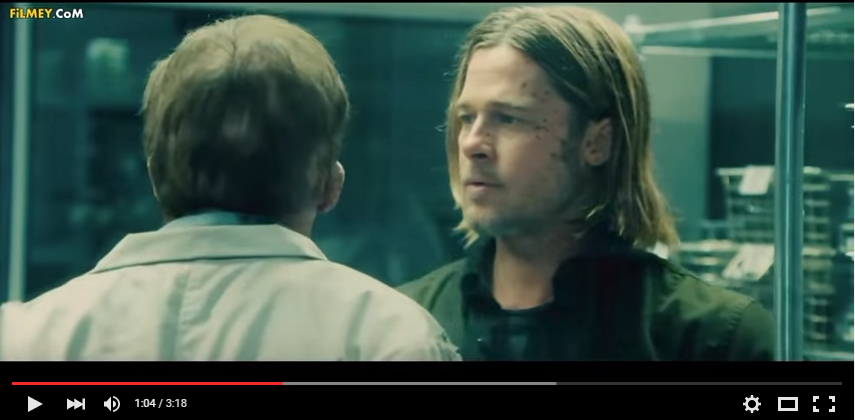
Over the shoulder shot (OSS)- This shot is often used hen two characters are interacting with each other. The camera is positioned behind the shoulder of one character with the other still in the frame. This helps establish the positioning of the characters.

This can be found from my originally chosen clip at 1:01.
Eye level/Straight on - The camera is placed on the same place as the character. This is usually used to show the exchange in dialogue.
Canted angle- This is shot with the horizontal fame that is not parallel to the horizon, which creates an either stylish or disorientating look.
Low angle- This shot is taken from a low position from a character which may imply power or superiority over another character.
High angle- This shot is taken from a high position from a certain character which may imply the character is the less dominant.
Birds eye view- This is where the camera is placed above the characters. this allows the audience to know where the characters are and in what environment.
Worms eye view- This shot is where the camera is positioned on the ground but tilted up to show the character.
Montage
This techniques involves a few different shots which are cut and put together. All of these different shots are shot shots however they are put together. This is usually used to show progression and it is also used to show passing time.
This montage was found from the film Fight club because I wasn't able to find a montage in my first chosen sequence. This example from fight club is a montage because it shows different shots of the actors doing what they had been told to do by the protagonist, in this montage it cuts back and forth to previous shots of the same area. This montage shows all of the different actors trying to get into and to start a fight, all of these scenarios are linked to each other by all happening at the same time in the film, they are all provoking others to fight them at the same time as each other, this is why is cuts back and forth from one scenario to the next then back to the previous scenario.


Providing and withholding information
This editing technique is when the filmmaker limits what the audience can see when they are framing the shots. For example, typically there is a cut just before something grizzly happens.


Parallel editing/cross-cutting
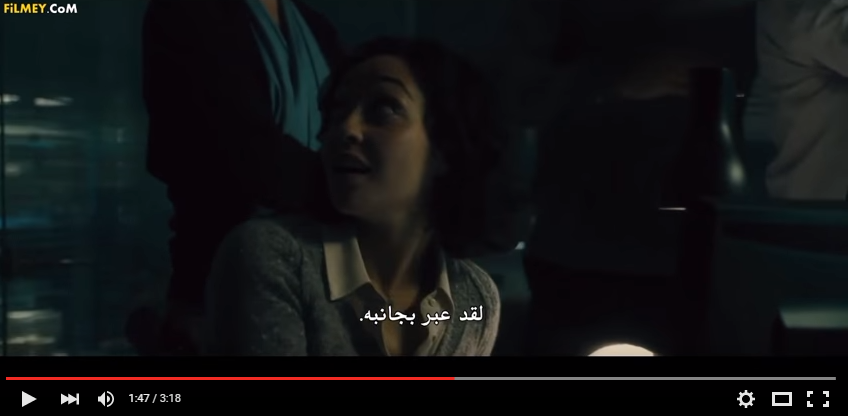
This is cutting between two different scenarios which are happening at the same time during the scene in the film. This conveys the idea that they are related to each other or that they will converge. In the first screen shot, there is a shot of the protagonist and a main zombie interacting with each other, however the second shot is another character looking at a screen which is watching what is happening in the previous shot on a screen. They are linked because the character in the second shot is watching what is happening in the first as it is being documented, ensuring that nothing goes wrong.

Editing rhythm
Editing rhythm is an editing techniques which editors use to keep the pace of the film consistent to the pace of the action or scene. Slow cuts have a more calm approach however fast and short cuts have more of a lively, aggressive approach.


Construction of the time and space of the story
This is where it is filmed to show a character traveling from one journey to another but not the entire journey is showed on screen. Editing is used to shorten the journey.


Cutting to soundtrack
This means that there is a soundtrack to fit the video. This helps when there is a change in the pace of a film for example an action.


Multiple points of view
Multiple points of view is where something happens in one scene involving multiple characters. We will see what is happening with one character which is cut to another character and so on. It shows a scene of what is happening with all of the characters involved.

Cutaways
A cutaway consists of cutting to a separate image to make a continuous flow of action. Cutaways are used to avoid accidental jump cuts. Cutaways are typically used to help to settle the genre and the mood for the scene. In this example of The Godfather, it sets a very romantic mood. There is a cutaway of the singer in between two shots to set the scene of a romantic night.

I have found an example of a cutaway in the film The godfather. In this clip this shot is found at 1:06. This is where we see Johnny talking about his story.

That then cuts to a shot of the singer at the mark of 1:08.

Which then cuts back to the other character who Johnny is talking to at the mark of 1:17.
Jump-cut
A jump-cut is when two shots follow each other with a different camera angle. This is an immediate transition between two shots from one shot following to another. This is used to create disorientation in the scene. In these screen shots, this is an example of a jump-cut. This is an example of a jump cut in the film breathless.

In the second shot at 0:03, the scene cuts to the protagonist getting something out of the glove box, the audience does not see him travelling towards the glove box.

No comments:
Post a Comment